In this article
No additional setup is needed in Shopify to run against LS Central. Some configuration however is required and values from that configuration are used in the LS Central Shopify Administration page.
After setting up a Shopify store, navigate to the store's Admin page.
Go to Settings-Apps and sales channels. Click Develop apps.
In versions of Shopify 2026 and later, the setup will be done under Development apps. See: Dev Dashboard
Note: If you already have an existing Shopify store and a valid API Key is known,there is no need to create a new app or complete the setup process in the Shopify Dev Dashboard. Simply use the existing Shopify store.
Older version of shopify before 2026, the setup was done like this:
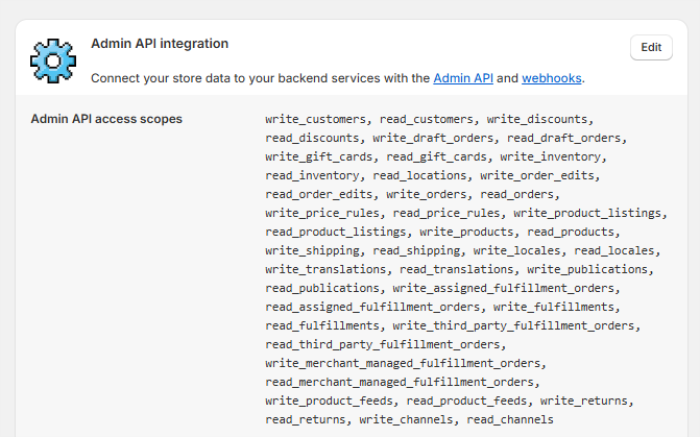
- Add a Custom app, and in its configuration give access to those API access scopes seen in the image below. Pick Latest Webhook version. This version information along with the shop name is needed to make up the URL that LS Central uses when it communicates with Shopify.
Sample URL: https://lsomnidev.myshopify.com/admin/api/2025-10
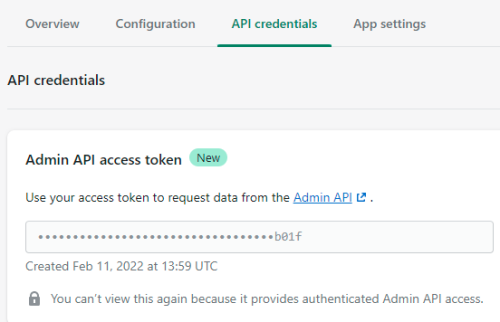
- In API Credentials, create a key and make a copy of it as you will need it later.
Note: Some plans for Shopify do not include PII (Personal Identifiable Information) for Customer, that is required to create Customer orders in LS Central. If you get Name missing error when Pulling orders, check your Shopify plan and make sure it include PII information.
Languages (Locale) Setup
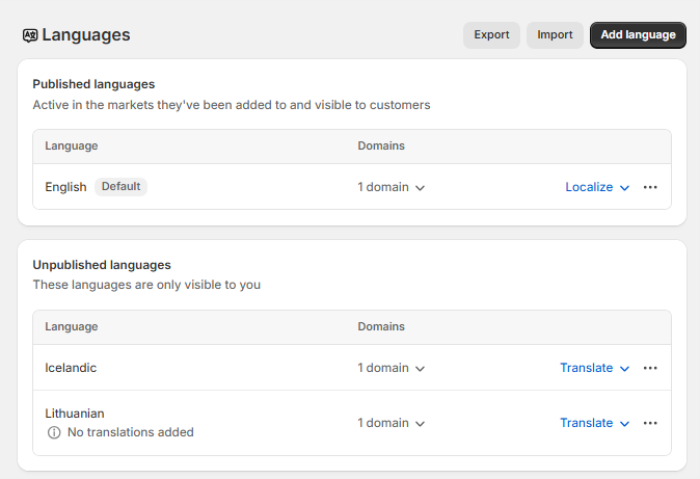
Before enabling language synchronization between LS Central and Shopify, the necessary languages must first be configured in your Shopify store. This step ensures that LS Central can retrieve the available locale codes and send translated content correctly to Shopify.
To configure languages in Shopify:
Go to Shopify Admin. Navigate to Settings - Languages and add or publish the languages you intend to use.
Tax and Duties Setup
Before sending or updating an item from LS Central to Shopify, ensure that the global tax settings are aligned between both systems to prevent pricing discrepancies on the storefront.
Note: If the Include Tax with Price option in Shopify Administration page is disabled, then the Include sales tax in product price and shipping rate check box in the Shopify Admin - Settings - Taxes and duties must also be unchecked (left blank). This ensures that item prices sent from LS Central are treated as tax-exclusive in Shopify, maintaining pricing accuracy.

Markets Setup
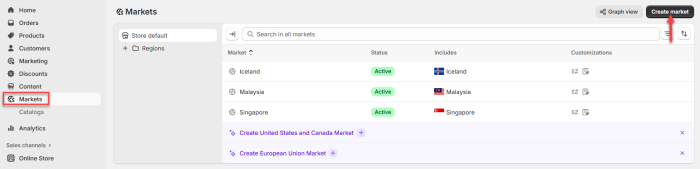
Before retrieving the Shopify Price Lists into the Mapping Price Lists page in Central, the markets must first be set up in the Shopify Admin page. After that, a catalog should be created and assigned to a specific market to ensure that the products in that catalog are available to customers within that market.
To configure markets and catalogs in Shopify:
Go to Shopify Admin. Navigate to Markets and click Create Market. Then, go to Catalogs and click Create Catalog.


Note: To ensure pricing accuracy between Shopify and LS Central, select the option to disable price rounding.
Video Tutorial
Watch the video on YouTube to learn more about Shopify and LS Central configuration: